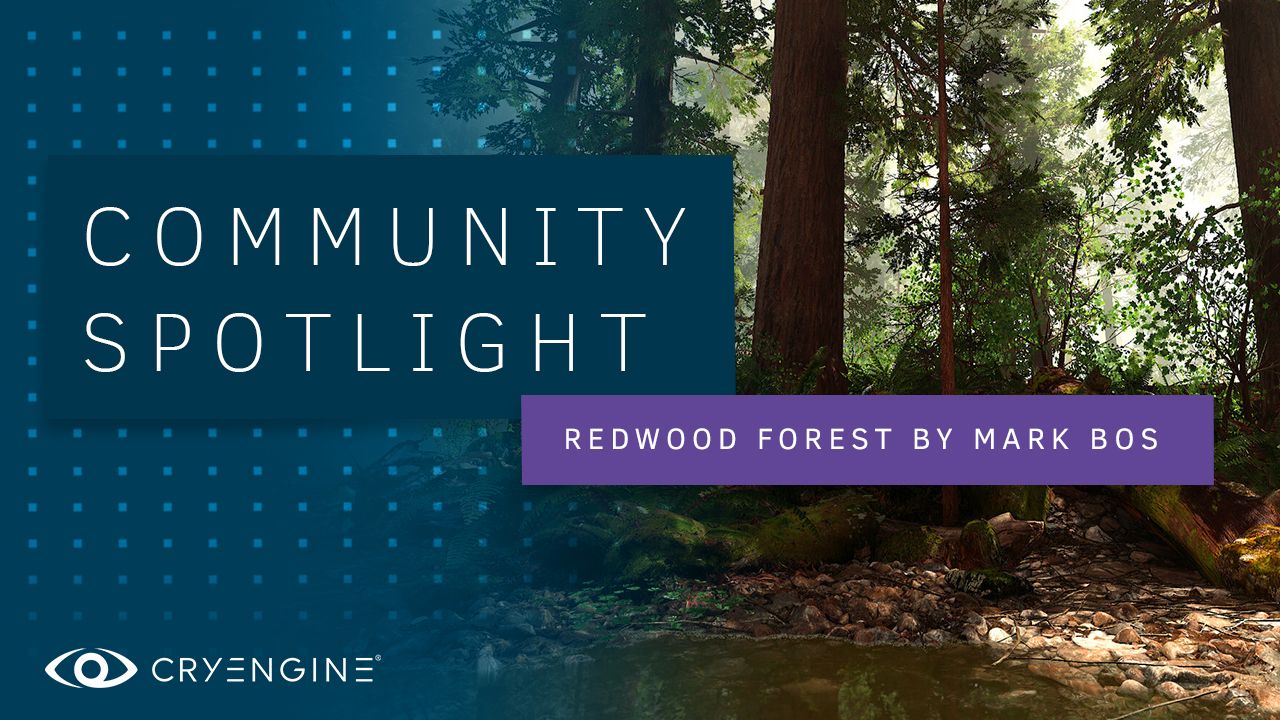

Redwood Forest Scene
We speak to Mark Bos, the creator of a glorious forest scene, to get his tips on using CRYENGINE
We’re proud that CRYENGINE gives developers and artists around the world easy access to the power of its best-in-class graphics. Mark Bos, a Netherlands-based artist, has created an atmospheric and beautiful forest scene using Megascans, and we caught up with him to find out how CRYENGINE helped him realize his vision.


Hey, Mark! What’s your history working with CRYENGINE?
Mark: I have been working with CRYENGINE since version 2. I began with modding and making my own stuff in the engine for fun. Later I switched to CRYENGINE 3, and I joined the Miscreated team and created a couple of assets. Then I moved on back to my own work and learning.
Why did you choose CRYENGINE for this project?
Mark: I chose CRYENGINE 5 because it is a great engine. I have always loved the engine! I absolutely love dynamic lightning, so after learning how to create scenes properly, deciding to use CRYENGINE for this project was easy.
What inspired you to create this scene?
Mark: Well, I simply love forests and nature in general. I really like how Endor looked in Battlefront 2 and wanted to try something similar.

Were there any specific features in CRYENGINE that helped you bring this scene to life?
Mark: SVOTI is awesome but also CRYENGINE'S volumetric fog system, which helps to add a lot of realism. Heightmap AO is also a really great feature. The ground of pebbles initially used POM (Parallax Occlusion Mapping), but due to distance limitations, I switched over to large planes with SPOM (Silhouette Parallax Occlusion Mapping) enabled which is a lot cheaper than using Displacement mapping. And it simply looks fantastic. Also, Megascans combined with CRYENGINE works really well.
Do you have any tips and tricks that you used to create the forest?
Mark: First of all, start basic. Make sure you have all your assets ready. It’s helpful to set up a level where you can place all the assets next to each other, which gives you an overview of what you have. So make sure your materials look good and are correctly set up. From there you simply start building it up.
First, I laid out the terrain and the river. Then I added small pebbles and wood. I then moved to larger rocks, larger logs, and wooden elements, then foliage, and lastly the trees. Finally, it was time for the main lighting pass, although I did play around with lighting as I built out the scene so I could see what would look decent or not. Lightning is a lot of trial and error, so try different sun positions as even just five degrees can make a big difference.
But my main tip would be to enjoy pushing your limits and to try different things. I’d also like to thank Crytek employees for their suggestions and being friendly, as well as the CRYENGINE Community for their tips and advice too.
Cheers Mark!
You can check out more of Marks excellent work over on ArtStation. If you’re inspired to make a scene with CRYENGINE, let us know on the forum, or via Facebook and Twitter, and you can follow in Mark’s footsteps by getting advice and tips from our friendly community, and our CRYENGINE development team, over on our official CRYENGINE Discord channel. If you find a bug in the engine, please report it directly on GitHub which helps us to process the issue quickly and efficiently.
Are you looking for your next career move? At Crytek, we value diversity and actively encourage people from all kinds of backgrounds and experience levels to apply to our open positions, so join us over at LinkedIn and check out our careers page.